
Your RV’s roof is one of the most critical yet frequently overlooked components of your rolling home. Exposed to scorching sun, pounding rain, hail, tree branches, and UV radiation year-round, an unprotected RV roof is a ticking time bomb. Water infiltration alone can cause thousands of dollars in damage — rotting wood, mold growth, electrical failures, and compromised structural integrity. The good news? The right RV roof coating can stop these problems before they start, saving you a fortune in repairs while extending the life of your vehicle by years or even decades.
In this comprehensive guide, we’ll cover everything you need to know about RV roof coatings: the different types available, how they work, what to look for, application tips, and how to choose the best product for your specific roof material.
Why RV Roof Coatings Matter More Than You Think
Most RV owners spend considerable time and money maintaining the engine, wheels, and interior — but the roof is often an afterthought until something goes wrong. The reality is that the average RV roof is subjected to extreme conditions on a daily basis. UV rays degrade rubber and fiberglass over time. Temperature swings cause materials to expand and contract, creating micro-cracks. Even a small crack or pinhole is enough for water to find its way in, and once moisture gets beneath your roofing material, the damage spreads invisibly until it’s catastrophic.
A quality roof coating creates a seamless, waterproof membrane that bonds directly to the roofing substrate, sealing existing micro-cracks and preventing new ones from forming. Beyond waterproofing, modern coatings also provide UV resistance, thermal reflectivity (which can significantly reduce interior temperatures), and in some cases, impact resistance against hail and debris.
Types of RV Roof Coatings
Not all RV roofs are created equal, and neither are the coatings designed to protect them. Understanding which type of coating is compatible with your roof material is the first step toward effective protection.
EPDM (Rubber) Roofs: These are among the most common RV roofing materials. They’re durable but prone to UV degradation, chalking, and shrinkage over time. Coatings formulated for EPDM typically use water-based elastomeric or acrylic compounds that flex with the rubber as it expands and contracts.
TPO (Thermoplastic Polyolefin) Roofs: TPO roofs are popular on newer RVs due to their energy efficiency and weldable seams. Specialized TPO-compatible coatings can further enhance their reflectivity and longevity.
Fiberglass Roofs: Found on many high-end motorhomes, fiberglass roofs are strong and relatively maintenance-free, but they can develop gel coat oxidation and surface cracks over time. Fiberglass-specific coatings restore the surface and add a protective layer against future degradation.
Aluminum Roofs: Older travel trailers and fifth wheels often feature aluminum roofs. These are susceptible to corrosion, seam separation, and leaking around fasteners. Rubberized and polyurethane coatings work well on aluminum, sealing seams and preventing rust.
What to Look for in a High-Quality RV Roof Coating
When shopping for RV roof coatings, several key performance metrics distinguish the best products from the rest of the pack. Elongation percentage is one of the most important — this measures how much a coating can stretch before tearing, which is critical for accommodating the thermal expansion and contraction your roof undergoes between seasons. Look for products with elongation ratings above 300%.
Adhesion strength determines how well the coating bonds to your substrate. A coating that peels or delaminate is worse than no coating at all, as it can trap moisture beneath the surface. UV resistance is another non-negotiable: coatings without proper UV stabilizers will chalk, crack, and fail prematurely. Finally, consider the coating’s mil thickness — a single coat that delivers 20+ mils of dry film thickness offers significantly better protection than thin coatings that require multiple applications.
For RV owners looking for a product that checks all of these boxes and more, the professional-grade RV roof coatings from ArmorThane are worth serious consideration. ArmorThane’s industrial-strength formulations provide exceptional adhesion, elongation, and UV resistance — qualities that separate them from consumer-grade products available at big-box retailers.
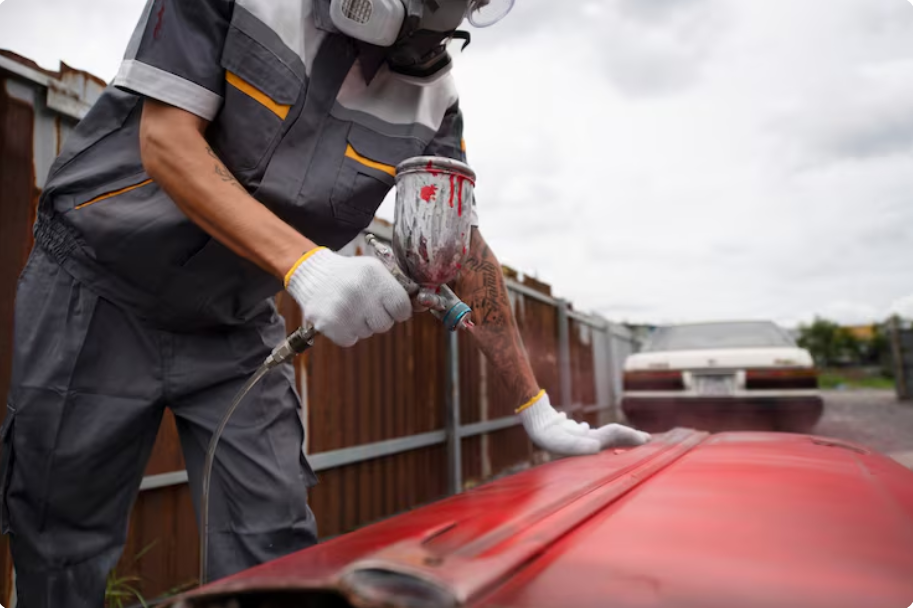
The Application Process: DIY vs. Professional
One of the great advantages of modern RV roof coatings is that many are designed for DIY application. With proper preparation and the right tools, a motivated RV owner can achieve results comparable to professional installation. That said, preparation is absolutely everything — a beautifully applied coating over a dirty, contaminated, or degraded surface will fail just as quickly as no coating at all.
Step 1: Clean the Roof Thoroughly. Start by removing all loose debris, then wash the entire roof surface with a dedicated RV roof cleaner. Pay special attention to areas around vents, skylights, air conditioning units, and antennas — these penetrations are common failure points where dirt and biological growth accumulate.
Step 2: Inspect and Repair. Walk the roof carefully and inspect every seam, seam tape, caulk joint, and penetration. Use an appropriate sealant to address any cracks, gaps, or lifted seam tape before applying your coating. The coating is a protective layer, not a repair material — underlying damage must be fixed first.
Step 3: Prime if Required. Some coating systems require a primer coat for proper adhesion, particularly on aged or oxidized surfaces. Check the manufacturer’s instructions carefully.
Step 4: Apply the Coating. Depending on the product, application may be by roller, brush, or spray. Work in sections, maintaining a wet edge to avoid lap marks. Pay extra attention to coating thickness around seams and penetrations — these areas benefit from additional material.
Step 5: Allow Adequate Cure Time. Most coatings require 24–72 hours to fully cure before exposure to rain or foot traffic. Plan your application accordingly.
How Often Should You Re-Coat Your RV Roof?
The lifespan of an RV roof coating depends on the product quality, climate, and how much sun exposure your rig gets. As a general rule, most elastomeric coatings should be inspected annually and re-coated every 3–5 years. RVs stored outdoors in the Sun Belt or used full-time will need more frequent attention than those stored in shaded areas or used seasonally.
Watch for these warning signs that your coating is due for renewal: visible chalking or whitening of the surface, small cracks or crazing visible on inspection, peeling or delamination around seams, or any evidence of moisture infiltration inside the RV. Catching these signs early and addressing them proactively is far less expensive than dealing with structural water damage.
The Cost of RV Roof Protection vs. The Cost of Neglect
A quality roof coating application typically costs between $200 and $600 for materials if you’re doing it yourself, or $800 to $2,500+ for professional application depending on roof size and condition. Compare that to the cost of a water-damaged roof repair: replacing the decking, interior ceiling, insulation, and roof membrane on an average travel trailer can easily run $3,000 to $8,000 or more. On a large Class A motorhome, those numbers can climb well past $15,000.
For RV owners who want to dive deeper into the world of roof maintenance, products, and tips specific to every roof type, RV Roof Protection is an excellent resource. Whether you’re dealing with a rubber EPDM roof that’s started to chalk or a fiberglass cap showing its age, having access to expert guidance tailored specifically to RV roofing can make the difference between a manageable DIY project and an expensive repair nightmare.
Choosing the Right Coating for Your Climate
Geography plays a significant role in which RV roof coating will perform best for your situation. RV owners in the desert Southwest deal primarily with intense UV radiation, high heat, and minimal precipitation — here, coatings with high solar reflectivity (measured as Solar Reflectance Index or SRI) are particularly valuable. A highly reflective white coating can reduce roof surface temperatures by 30°F or more on a hot day, cutting air conditioning load and improving interior comfort.
In the Pacific Northwest or the Gulf Coast, moisture resistance and mold inhibition take priority. RVers who frequently camp in wooded areas should also look for coatings with added resistance to biological growth — algae, moss, and mildew can cause coatings to degrade faster in humid, shaded conditions.
Those who travel extensively across different climates — especially full-timers who might experience everything from Arizona summers to Minnesota winters in a single year — should prioritize coatings with the widest temperature application and service range and the highest elongation ratings to handle dramatic thermal cycling.
Final Thoughts
Your RV represents a significant investment, and the roof is your first line of defense against the elements that can destroy that investment. A proactive approach to roof maintenance — including regular cleaning, inspection, and timely application of a quality roof coating — will pay dividends in lower repair costs, better interior comfort, and a higher resale value when it’s time to upgrade.
Whether you’re a weekend warrior with a small travel trailer or a full-time nomad living aboard a 40-foot Class A, the right RV roof coating is one of the best maintenance investments you can make. Take the time to choose the right product for your roof material and climate, prepare the surface properly, and apply it with care. Your future self — and your wallet — will thank you.
